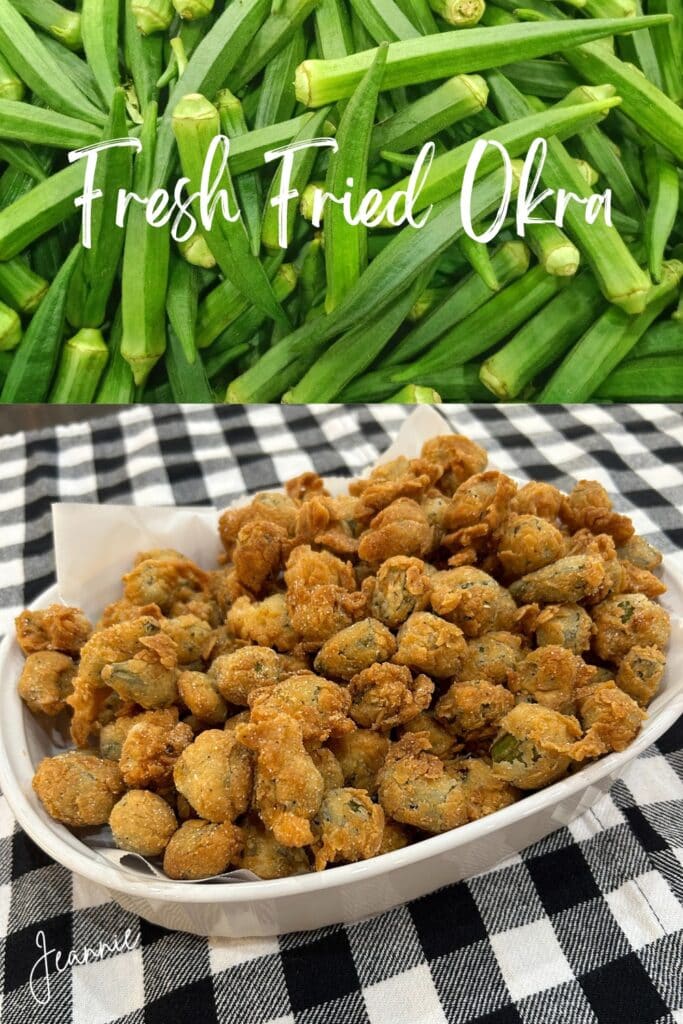
Southern‑Style Fried Okra: Cornmeal & Buttermilk Crispy Recipe
Family & Food
When I think about family favorites, Southern-style fried okra is always near the top of the list. It’s one of those dishes that brings back memories of family meals, backyard gardens, and summer suppers. Crispy, golden, and easy to make, fried okra has been a staple in Southern kitchens for generations—and for good reason.
Fresh Okra
When it comes to Southern-style fried okra, fresh is always best. Don’t get me wrong—I’ll reach for a bag of frozen breaded okra in a pinch, and it does the job. But it just doesn’t compare to the crisp, clean flavor and texture of fresh-picked okra.
Honestly, I hadn’t realized how long it had been since I’d fried okra straight from the garden. Probably not since my dad’s last garden a few years back. Growing up, fresh okra was a summer staple. As soon as those pods reached a couple of inches long, Mother would hand us a sharp knife and send us out to the garden.
Okra grows upright on the stalk—if you’ve never picked it before, you might not know that! The plants stand tall and proud, and those fuzzy green pods point straight to the sky, just waiting to be harvested.
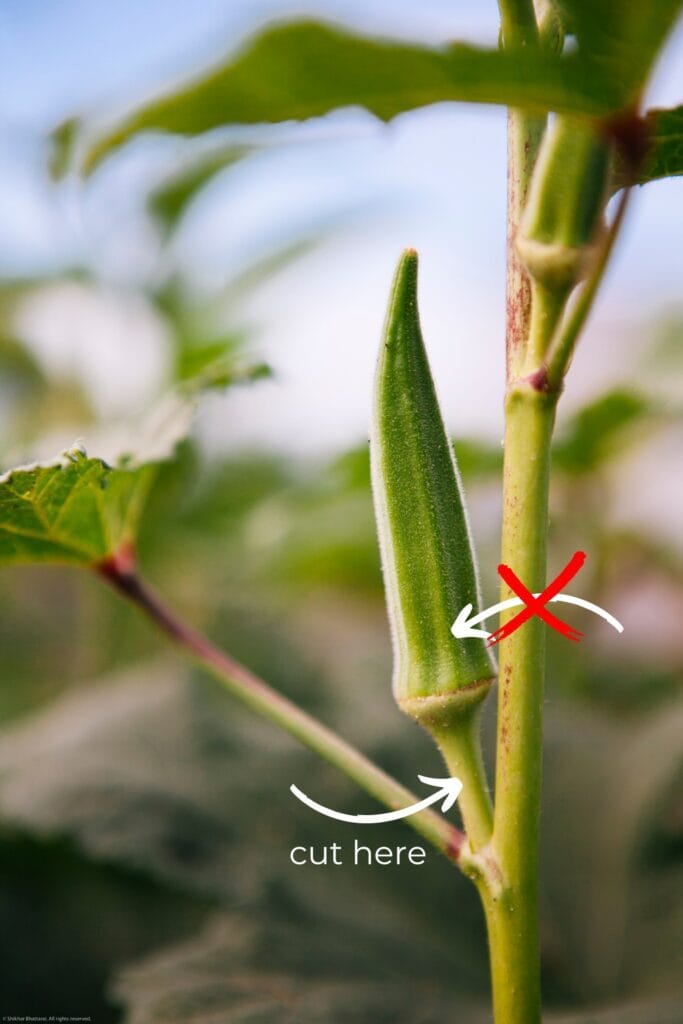
A Knack for Cutting Okra
There is a knack for cutting okra. You have to cut it at the stem and not into the pod itself. If you cut into the pod, there is a slightly slimy, sticky fluid that will leak out. When cut up, breaded, and fried, there is no slime. But boil a piece whole and bite into it….yep…slime! Some people love it, some hate it. I could never eat boiled okra, but my mother loved it. Occasionally, she would cook a few pods in with a pot of peas. Sometimes she would make us try it before we could leave the table, but she soon gave up on it.
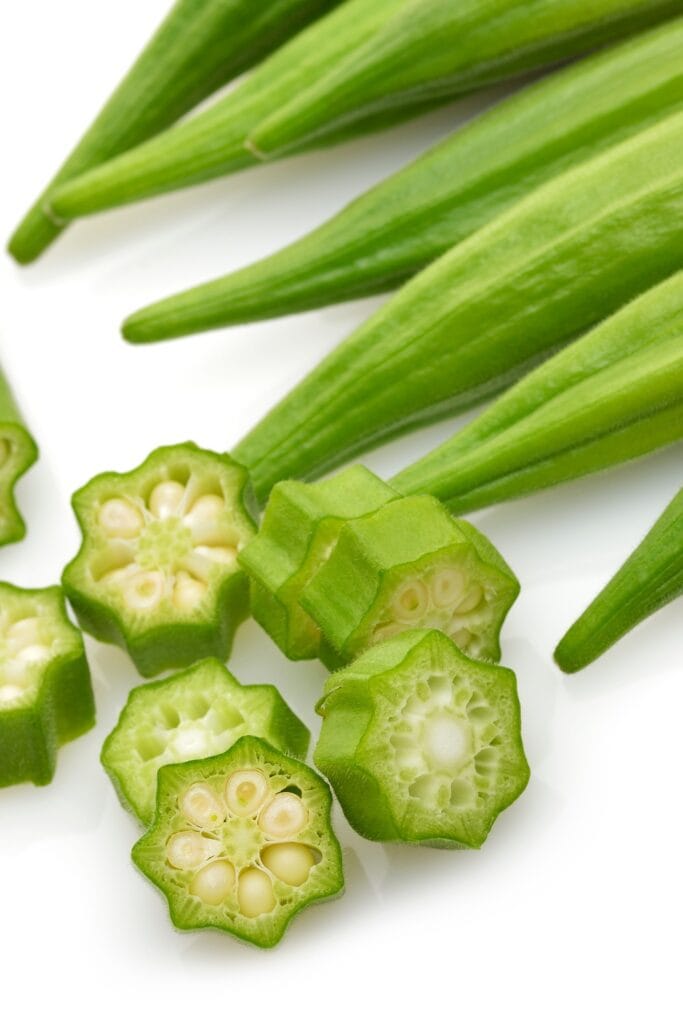
Okra has to be cut frequently from the plant or the pods will grow too large to be at their best. Okra that is anywhere from 2-5″ in length is just about the best. If it grows larger than that, it’s too tough and the seeds will be large.
Okra has a prickly-like covering. Some varieties are smoother than others, and some are even reddish to purple in color.
However, if larger pods are left on the stalk to dry, they make beautiful decorations painted gold!
Frying Fresh Okra
I really hadn’t thought of doing a blog post when I prepared the fried okra so I didn’t take images along the way. But it’s so simple you won’t need images to fix up a batch of fresh fried okra))
No real measurements are needed for fried okra because it just depends on how much okra you plan to fry. I probably used about a pound of fresh okra and it yielded a casserole dish full.
First Step- Prep the Okra
Rinse the okra and pat it dry. Snip off the top and pointy tip—both are edible, but I trim them like my mother always did. Then slice into ½-inch pieces, and you’re ready to move on.
Second Step – Egg & Buttermilk
Beat one egg with about ½ cup of buttermilk. If you’re making a bigger batch, just add another egg or more buttermilk. Plain milk works in a pinch, too.
As you cut up the okra, place it in the bowl of egg mixture and thoroughly coat each piece.
Third Step- Breading Mix
Combine equal parts cornmeal and flour—about 1 cup each works well. Add salt and pepper to taste, then mix it all together.
I like using a plastic bag to dredge the okra—it makes coating quick and cleanup simple. You can use a bowl, but I prefer rolling the bag side to side to get everything evenly coated. The extra-large Great Value Twist Tie bags are my go-to—they’re inexpensive and super versatile.
Dip the sliced okra into the egg and buttermilk mixture, letting any excess drip off. Then transfer it into your flour and cornmeal mix—I usually do the whole batch at once.
Seal the bag tightly and gently turn it back and forth to coat the okra evenly. If some pieces still look a little wet, just add a bit more meal or flour and toss again. You can also use a large bowl and turn the okra by hand if you prefer.
Our family loves extra-crispy okra, so if I have leftover egg mixture, I’ll sometimes double-dip the okra and dredge it a second time for an even crunchier coating.
Fourth Step- Fry the okra
Fill a cast iron skillet with about 1½ inches of vegetable oil and heat it to 350–365°F. To test the temperature, drop in one piece of okra—if it starts to sizzle and fry, you’re ready to go.
Add the okra pieces one at a time, being careful not to overcrowd the skillet. They need a little space to crisp up properly. Let them brown on one side, then give them a gentle turn to finish frying evenly.
Depending on how much you’re frying, it may take 3–4 skillet batches to get it all cooked. Once the okra turns golden brown, remove it with a slotted spoon and drain it on paper towels.
I like to keep the oven on warm and transfer each finished batch to a pan inside while I fry the rest—it keeps everything crisp and ready to serve.
Taste and season with a little more salt and pepper, if needed. Then dig in!
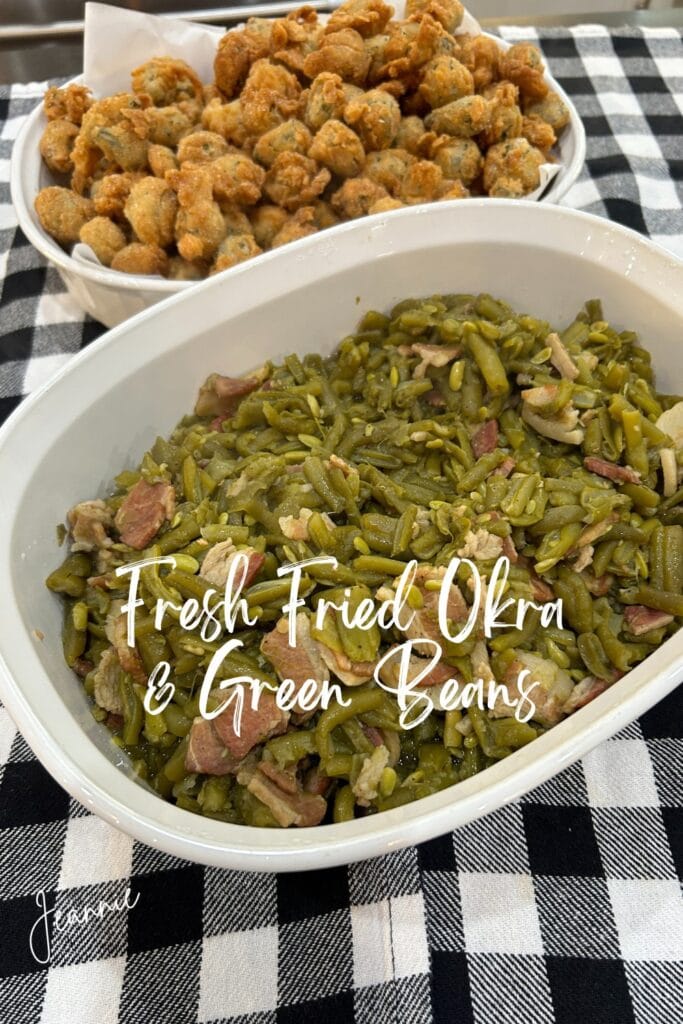
Fried Okra & Geen Beans – Southern Staples
Fried okra and green beans are standard fare for one of our family meals. They’re usually served up alongside chicken and dumplings, stewed potatoes, a slice of cornbread, and a big glass of iced tea. Yum!
Once you’ve mastered fried okra, why not give fried green tomatoes a try too? They’re another crispy Southern classic you’ll love!

And of course, you need cornbread with fried okra! Here’s a family favorite recipe that puts a tasty twist on classic cornbread.