Baked Apples with Bacon & Cheese

A Recipe Full of Memories and Love
This post is a repost from a few years ago, and it holds a special place in my heart. In the original video, I shared a bit about my sister, who was in a nursing facility at the time. Since then, she has sadly passed away, but revisiting this recipe brings back warm memories. It’s a reminder of how food can connect us to loved ones and cherished moments, even after they’re gone.
Sweet and Savory Baked Apples Made Easy
This recipe is a simple and delicious way to make baked apples filled with brown sugar, butter, and a hint of cinnamon. Cooked in the air fryer until the bacon turns perfectly crispy, these apples are topped with cheese for a warm, savory-sweet treat you’ll love!
Inspiration
This baked apple recipe was inspired by Brenda Gantt. If you haven’t seen her on Facebook, be sure to check out her page, Cooking with Brenda Gantt. I watched her make these apples, and they looked so delicious, I just had to try them myself!
Baked apples are a classic Southern comfort food that has always been a favorite in our house. Growing up, my mother would make them in a cast-iron skillet, and they were such a treat! She’d core the apples, fill them with brown sugar, and top them with butter. As they baked, the apple juices would collect in the skillet, and she’d spoon the syrupy goodness back over the apples. Simple yet so delicious! All you really need are apples, brown sugar, butter, and a touch of cinnamon to enjoy this timeless Southern dessert.
But Brenda took baked apples to the next level by adding bacon and cheese, so I knew I had to try it! I decided to make mine in our Ninja Air Fryer for a quick and easy twist. We keep the air fryer on the back porch for convenience—plus, the first time I used it to cook hamburgers, it created way more smoke and steam than I wanted in the kitchen! Despite that, we absolutely love it and use it all the time for everything from quick meals to creative recipes like this one.
Ingredients
How to Prepare
This recipe is flexible—there’s no need for precise measurements. Whether you’re baking one apple or a half-dozen, it’s all about a spoonful here and a sprinkle there. Here’s how to make these delicious baked apples:
Apples:
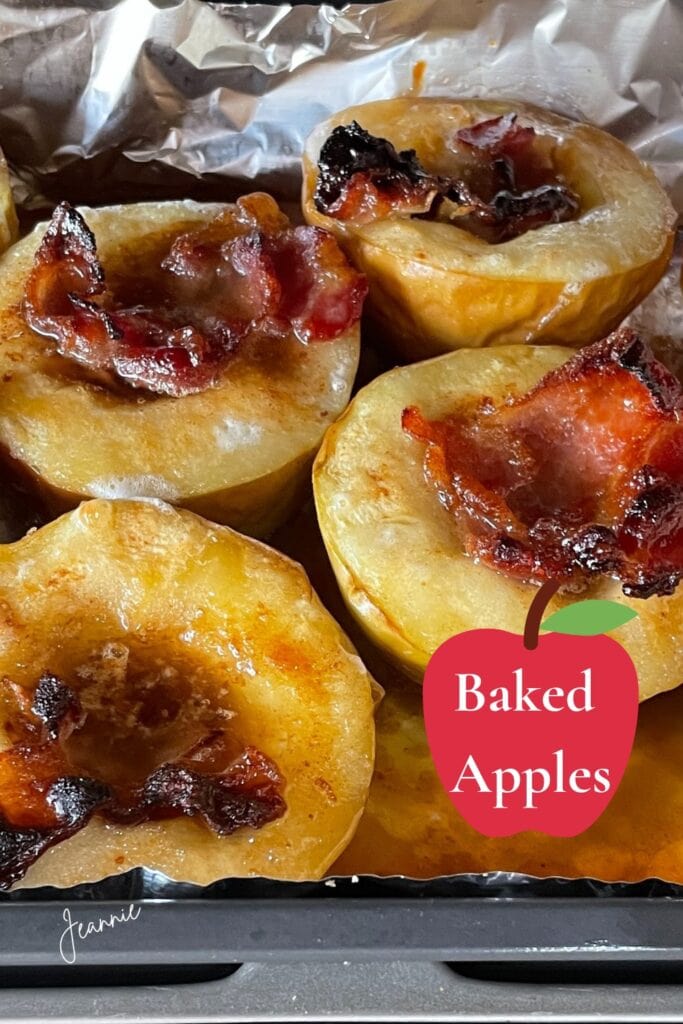
Choose firm, crisp apples like Fuji, Honeycrisp, or Granny Smith. Slice the apples in half (horizontally or vertically) and core them, or leave them whole and just remove the core. Be careful not to cut through the bottom, and no need to peel them!
Brown Sugar:
Fill the center of each apple with a heaping spoonful of brown sugar. Top with a pat of butter and a sprinkle of cinnamon for extra flavor.
Bacon:
Use thin-sliced bacon and lay about half a strip across the top of each apple for a savory touch.
Bake:
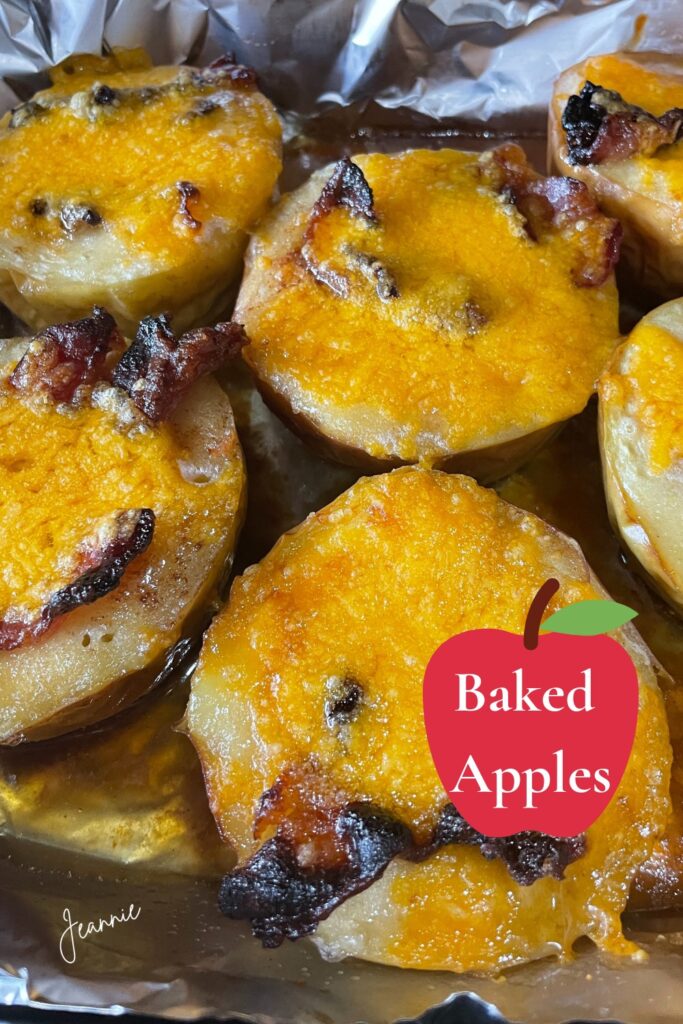
Preheat your oven or air fryer (I used my Ninja Air Fryer) to 350°F. Bake the apples until the bacon is crisp—about 20 minutes. Then, reduce the temperature to 300°F, sprinkle shredded cheddar cheese on top of each apple, and bake for another 10 minutes. Adjust times and temperatures as needed based on your oven or air fryer.
Enjoy these warm, sweet-and-savory baked apples straight out of the oven!

Air Fryer
Speaking of air fryers, we’ve been absolutely thrilled with our Ninja! This versatile appliance has become a staple in our kitchen, and I think it’s the third Ninja product we’ve purchased in recent years. If you’re curious about trying one out for yourself, here are my affiliate links where you can take a closer look:
We couldn’t recommend it more—it’s a game-changer for quick and delicious cooking!
We keep our air fryer on the back porch, which works perfectly for quick cooking but has its challenges. Even though the porch is screened in and I have roll-down shades, it still tends to get a bit dusty. To protect the air fryer, I purchased a Canvas Cover. from an individual seller on Walmart. It’s been a great solution to keep it clean and ready to use!
Cook Time
I wasn’t entirely sure how long the baked apples would take, so we preheated the air fryer to 350°F and set the timer for 30 minutes. After 20 minutes, I checked on them and found that the bacon was already perfectly crisp, but the apples needed a few more minutes to finish cooking.
I turned the heat down to 300°F, added some shredded sharp cheddar cheese on top, and baked the apples for another 10 minutes until they were perfectly tender. The aroma was incredible! I practically had to fight my husband off just to let them cool for a moment before bringing them into the house.
Serve
Serve the baked apples warm, and don’t forget to spoon some of that delicious juice over the top for extra flavor! While there will be a bit of bacon grease in the juice, it adds a surprisingly tasty touch. If you have leftovers, refrigerate them, and once they’ve cooled, you can skim off most of the bacon fat if desired. They reheat beautifully, making them just as enjoyable the next day!