Crusty Crispy Bread Slices
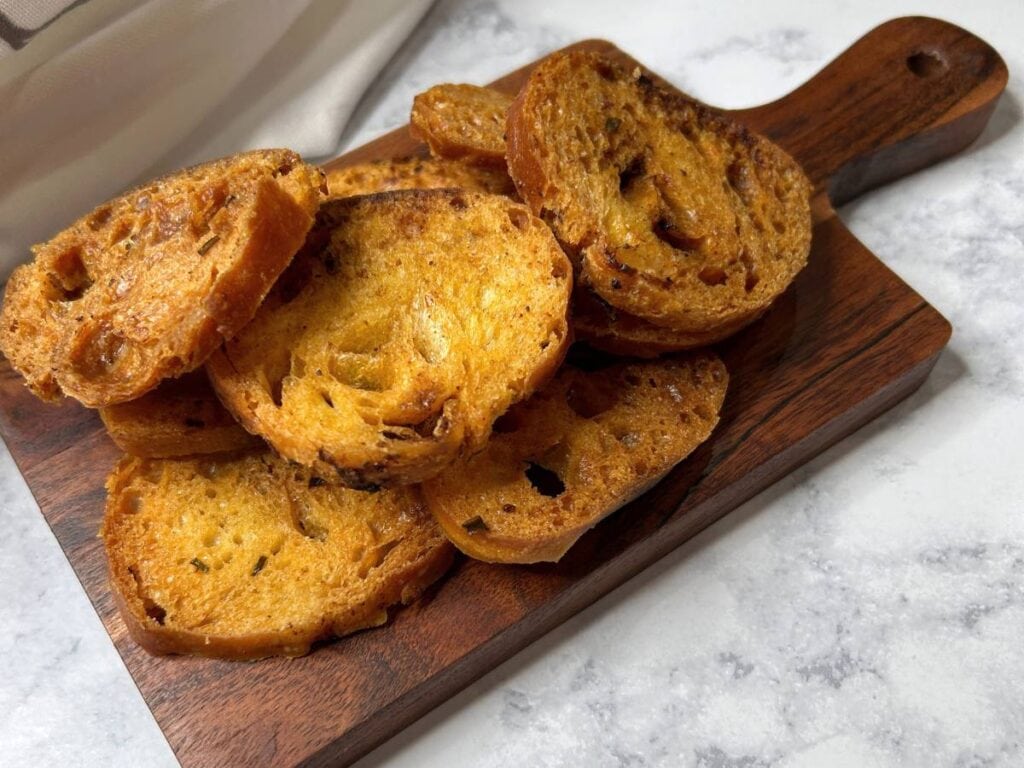
Crusty Crispy Bread
If you’re looking for the perfect crunchy companion for your charcuterie board or a delicious way to scoop up dips, these crusty crispy bread slices are a must-try! They also make fantastic homemade croutons—way better than store-bought, which can be too garlicky or too bland. I love making these as a snack, a crispy base for meats and cheeses, or crumbling them over salads for extra crunch. The best part? They’re incredibly easy to make, stay fresh for days in a zip-top bag, and can be seasoned just the way you like!
What you’ll love about this recipe:
Just a few ingredients
Choosing the Right Bread
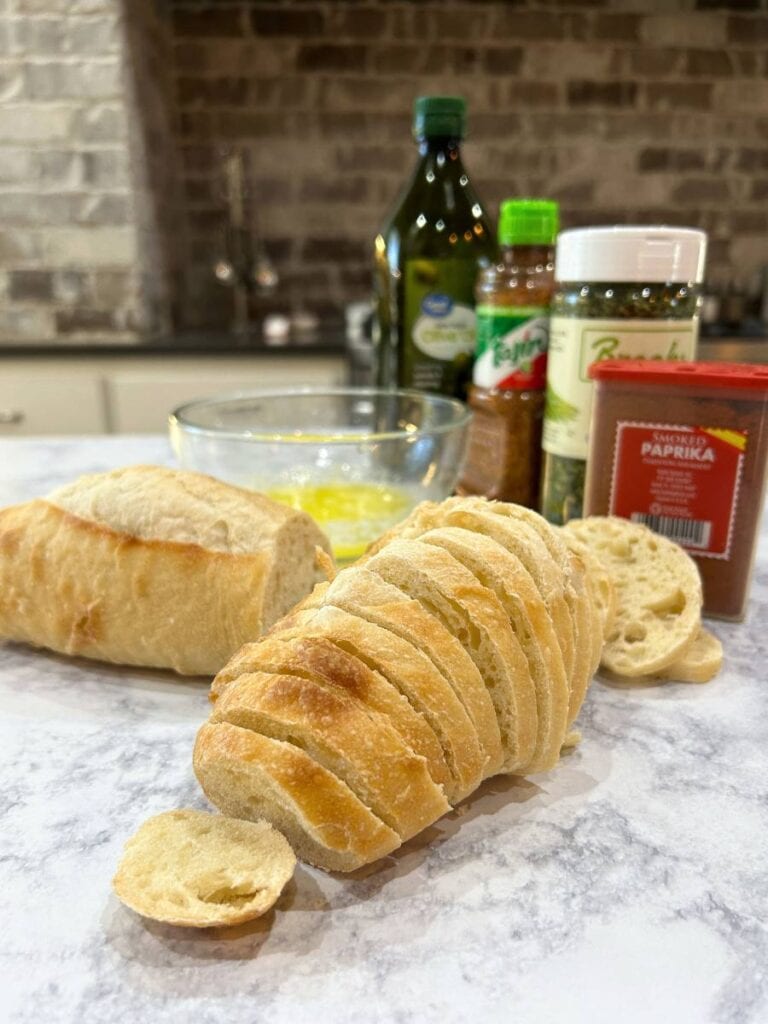
For the best crusty, crispy texture, start with a dense bread like French bread or sourdough rolls. This time, I used a French baguette from Walmart, which had a diameter of about 2–3 inches—what I like to call “small French bread.” You can also use individual French or sourdough rolls for a similar result.
When slicing, aim for slightly thicker than 1/4 inch to achieve the perfect balance of crunch and chew.
Seasoning Your Crispy Bread
One of the best things about making this crusty, crispy bread is that you have full control over the seasoning! If you love garlic, go for it—but since we don’t cook with a lot of it, I left it out this time. Instead, I used Tajin, a flavorful blend of chili peppers, lime, and sea salt, along with a touch of smoked paprika and chives for added color and depth. Of course, you can mix and match your favorite spices to create a flavor that’s uniquely yours!
Butter & Olive Oil Mixture
Start by melting butter and mixing it with an equal amount of extra virgin olive oil—I used 1/4 cup of each to begin with.
Next, stir in your seasonings. I didn’t measure exactly, but a good starting point is 1 teaspoon of Tajín and smoked paprika, plus about 1 tablespoon of chives for a pop of color and flavor. Feel free to adjust based on your taste!
Keep in mind that the bread soaks up the mixture quickly. I had to add a little more olive oil as I went to coat all the slices, so the exact amount you need will depend on how much bread you’re dipping..
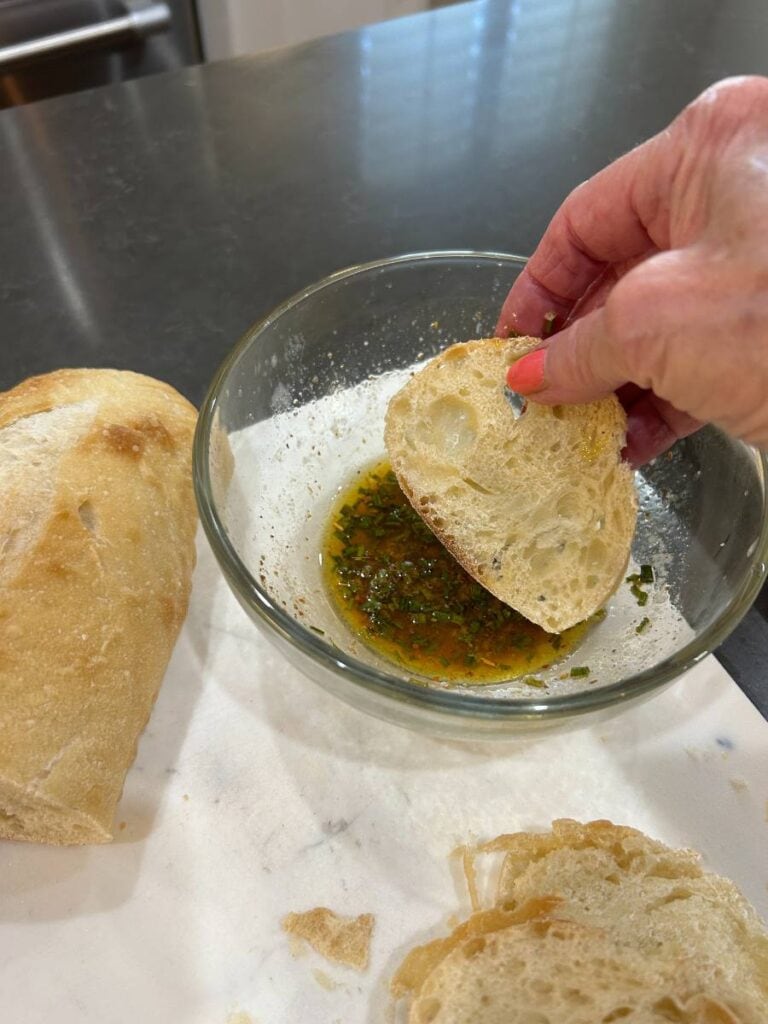
Dip the break quickly and drain the excess. Place on a parchment paper lined cookie sheet and place in the oven at about 250° to 300°

Baking the Crispy Bread
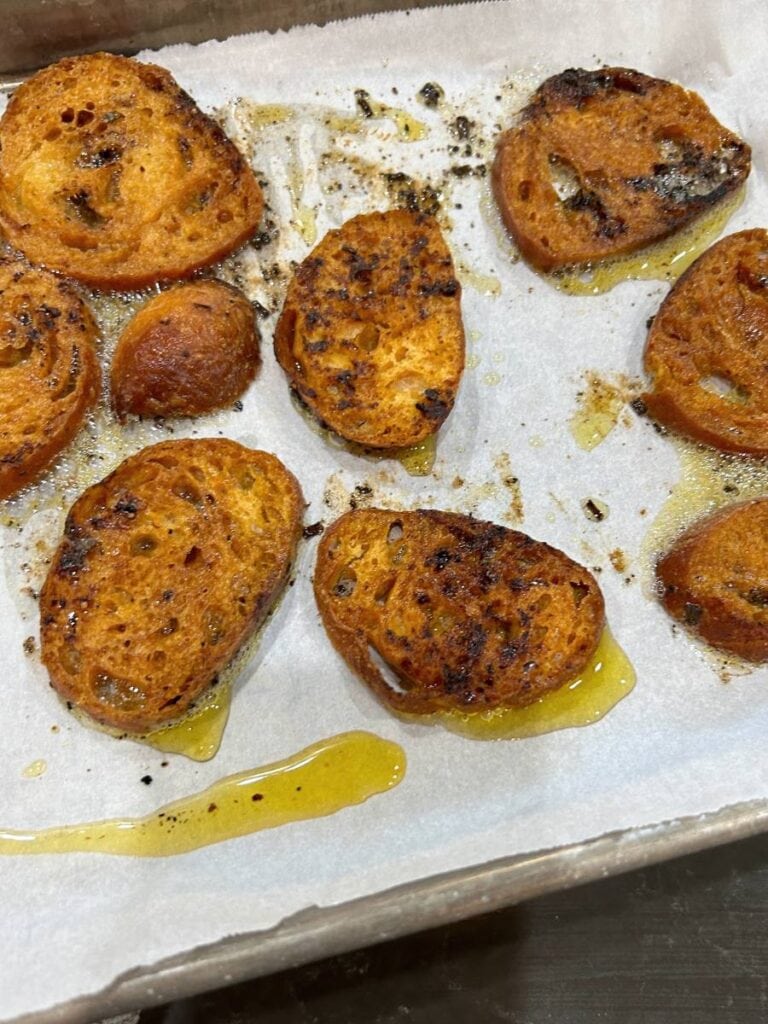
Bake the bread slices until they turn a beautiful golden brown, flipping them once so both sides crisp up evenly. The baking time will vary depending on your bread, but the key is to bake slowly to ensure the slices become perfectly crisp all the way through—even bordering on the crunchy side.
My slices baked for about 20–25 minutes, but I recommend checking them every so often to get the texture just right. You’ll also notice some of the oil baking out, leaving a bit of excess in the pan—that’s totally normal!
Cooling and Storing
Once your bread slices are beautifully browned and crisp, remove them from the oven and let them drain on paper towels or newspaper to absorb any excess oil. Allow them to cool completely before storing them in a zip-lock bag or an airtight container to keep them fresh and crunchy for days.
Looking for another delicious homemade bread option? Try Kentucky cornbread—it pairs perfectly with vegetables or a warm bowl of soup!
so good with chili or tomato soup
Kentucky Cornbread
It’s really easy to make and great with tomato soup or chili. Well, you can just about eat it with anything, or by itself! This cornbread is loaded with calories so if this is of major importance, you might want to pass on this one.
Making Croutons
These crusty, crispy bread rounds break easily into bite-sized croutons, making them perfect for salads or soups. It’s actually much easier to bake them as full slices first and then break them into smaller pieces, rather than trying to cut tiny chunks before baking. Simple, crunchy, and delicious!
Enjoy!
Thanks so much for visiting my blog—I truly appreciate it! If you give this recipe a try, I’d love to hear how it turned out. Do you have a favorite seasoning blend or a creative way to enjoy these crispy bread slices? Drop a comment below and share your tips!
If you enjoyed this recipe, don’t forget to share it with friends who love homemade treats. And if you’d like more easy and delicious recipes, be sure to follow along—you can subscribe to my blog or connect with me on social media for more kitchen inspiration! Happy cooking! 😊