I Took a Cookie Decorating Class!

A while back—three years ago, to be exact—I took my very first cookie decorating class. With fall just around the corner, it felt like the perfect time to resurface this post, since we were decorating adorable autumn-themed cookies.
Let me go ahead and say: the cookies in the photo? Not mine! Those were the instructor’s perfectly piped creations. 😂 But it was my first time using royal icing, and even though my cookies weren’t quite photo-worthy, I had a great time, learned a lot, and left with a new appreciation for just how much work goes into decorated cookies.
It’s all in good fun—it’s just a cookie, remember? No cookie business plans here!
Expectations
I’ll admit—I had very high expectations for myself going into the class. The class itself was wonderful and well done, but I was the one who ended up a little disappointed… mostly because I thought I’d walk out of there ready to decorate professional-looking Halloween cookies after just one lesson. 😂
I had really committed too—I checked my pantry, made a special trip for almond flavoring, confectioners sugar, and meringue powder, and Matt and I even gathered up Halloween cookie cutters from Carrie. I had this vision of going home, baking a batch of cookies, and immediately putting my new skills to use.
Thankfully, I never got around to baking those cookies—because let me tell you, I was not ready to decorate anything I’d feel good about gifting! But hey, I haven’t given up. I may not be a cookie pro (yet), but the learning process has been sweet, messy fun—and that’s really what it’s all about.
Preparation
Thinking about learning to decorate cookies? Start by watching a few videos! It’s a great way to get familiar with the terms your instructor will likely use—like medium consistency icing, flooding, outlining, piping, and thin icing.
It all looks so easy in the videos (doesn’t it always?), but let me tell you—piping a straight line or a perfect dot is way harder than it looks. Still, it’s fun to try, and watching ahead of time gives you a big head start once you’re actually hands-on with the icing.
Class
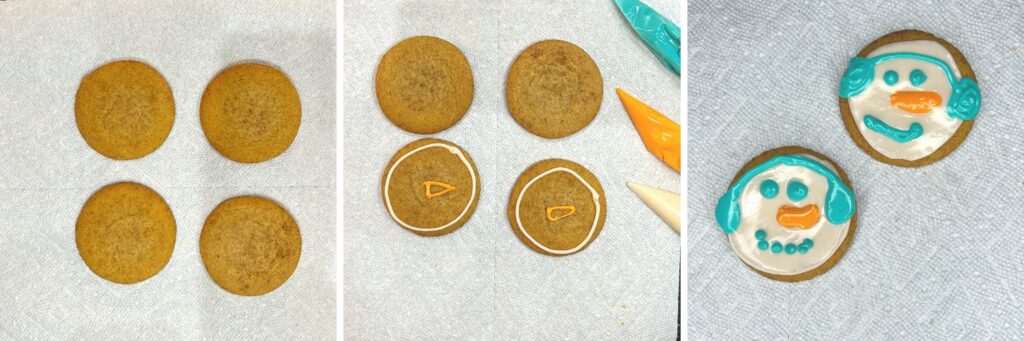
Our instructor, Cassie Angle, made things as easy as possible for us—she brought pre-baked sugar cookies and even used an edible marker to draw outlines on each cookie for us to follow. It sounded simple enough—like coloring inside the lines of a coloring book, right?
Well… not exactly! 😂
Turns out, icing doesn’t behave quite like crayons—and staying inside those neat little lines was a lot harder than it looked. But it was all part of the learning curve, and Cassie made it fun every step of the way.
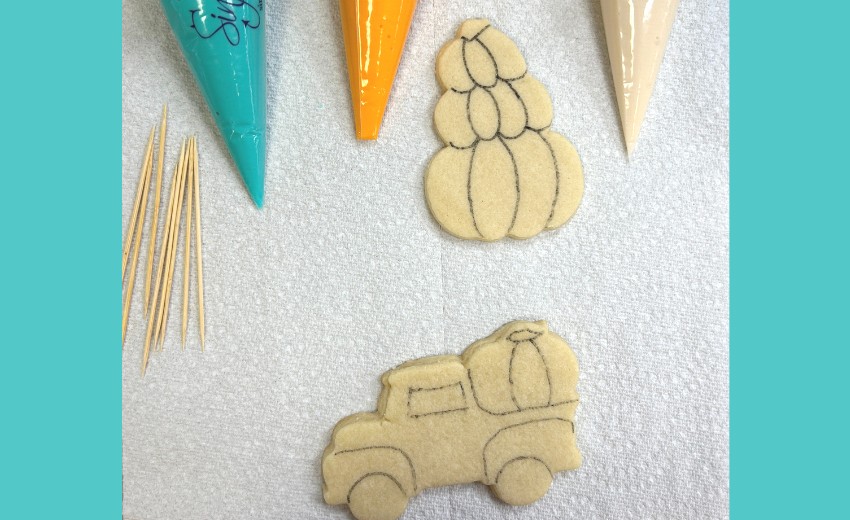
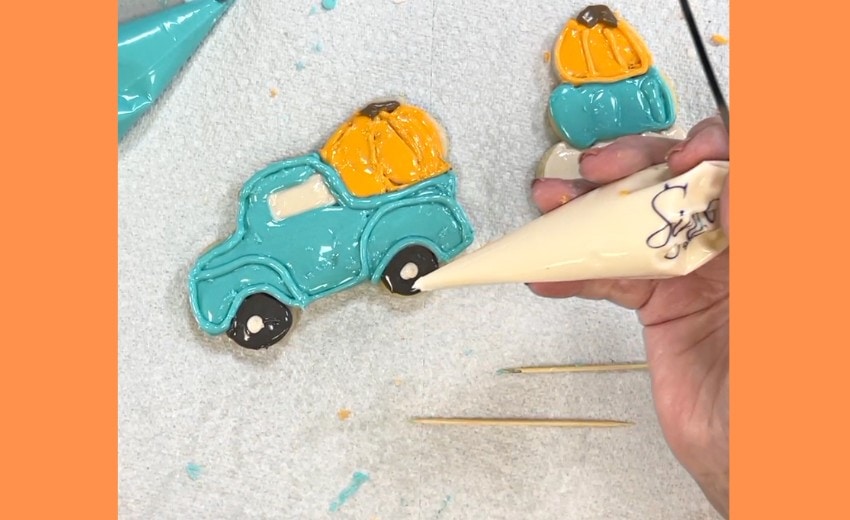
Cassie even had the royal icing prepped and ready for us in small piping bags—all we had to do was snip the tip and start decorating! The smaller bags were the perfect size for cookie work, especially for beginners.
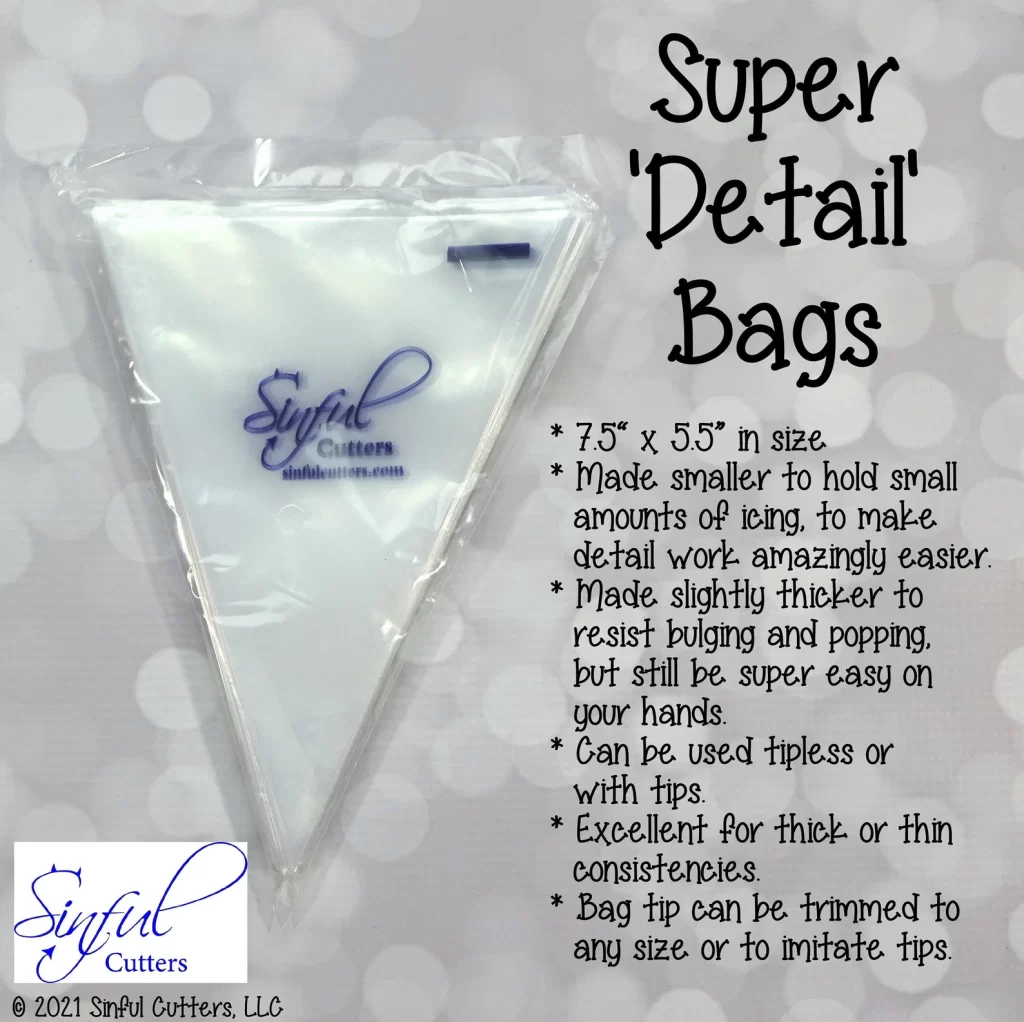
Before the class, I had checked the cake decorating section at Walmart, but all I found were large piping bags designed for buttercream and big decorating tips. Definitely not ideal for cookies! Cassie told us her icing bags came from Etsy, and they worked beautifully. Here’s the link if you’re looking for something similar: Link below.
She had even closed each icing bag with a small zip tie—a detail I would’ve never thought of myself! It kept everything neat, sealed, and ready to use.
Cassie explained that when we were ready to decorate, we should snip just the very tip of the bag—barely enough to let the icing flow. If you cut off too much, the opening’s too big and your lines won’t be clean. It’s definitely one of those practice-makes-perfect skills that looks simple but takes a few tries to get right. 😉
The icing was sort of a balance between the “medium” that you outline with and the “thin” that you fill in with. There is a limit as to what you can do with a roomful of newbies)))
So we outlined step by step and did our best to allow for drying in between the next step, but it was hard! I imagine if you were decorating several cookies instead of just two, you would outline all of them, then go back and start filling in. By that time, the first outlined cookies would be dry. If you don’t wait until it dries a bit, it sort of runs together.
Anyway, here’s my first try at decorating cookies. Nothing to write home about, but they tasted good and that’s the most important thing! It doesn’t matter how pretty a cookie is if it tastes yucky.
Practice Practice Practice
I haven’t baked any cookies for decorating yet, so I don’t have a tried and true recipe, but if I get one, I’ll come back and post. Same with the royal icing. My plan is to try to improve on the decorating first, then focus on baking the perfect cookie. Because, what’s the point of decorating a cookie if its shape is irregular, thin or thick, unevenly browned, too brown, or not done! Goodness, there is a lot to mastering that “just right” cookie not even considering the taste!
Our instructor had it down pat though. These cookies were just the right thickness and done without being brown and they tasted so good! And the icing, was dry and firm, but not so hard you were afraid to take a bite))
Supplies
Cookie Cutters: Now when I do try baking some sugar cookies for decorating, I hope that I can find the cookie cutters that I collected over the last 50 years. I think I gave them to Carrie to keep…. let’s see if she kept them))) If not, I’ll pick up some new ones or maybe use a “snuff glass” like my mother used to do. They make the perfect size for sugar cookies or tea cakes as we called them. Now I do have a great recipe for tea cakes. I’ll make some soon and share that with you.
Rolling Pin: I have an old wooden one that someone gave me when I married. You can’t wear those things out. And I have a marble one that I gifted my mom so many years ago. But it’s heavy, I don’t know if she ever used it or not. But it was pretty)))
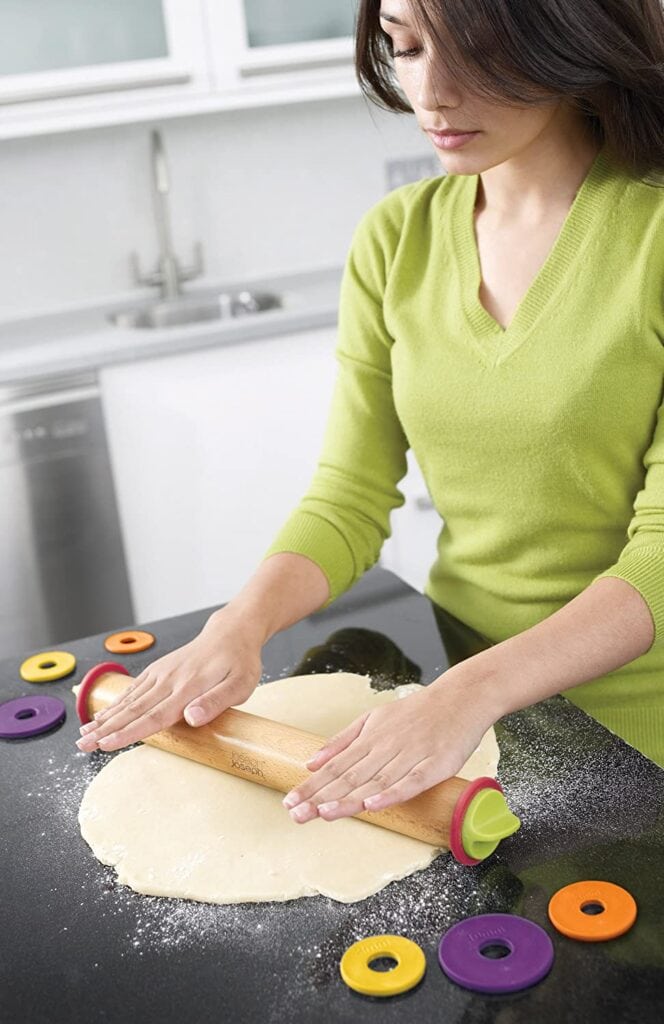
I do have to share this rolling pin that I saw. It has assorted rings on the ends so that you can roll dough to the desired thickness.
I think one of the major problems in having uneven cookies is probably the thickness of the dough. Some parts are thin, others thick or have lumps and bumps.
Seems like this rolling pin would solve that. Plus, I saw them using it (or something similar) on the Food Network in the Halloween Cookie challenge! I found one on Amazon, and I’m ordering mine today))
I carried home the leftover icing from the class and practiced on some chocolate-covered Ritz crackers. Any sort of smooth cookie would work.
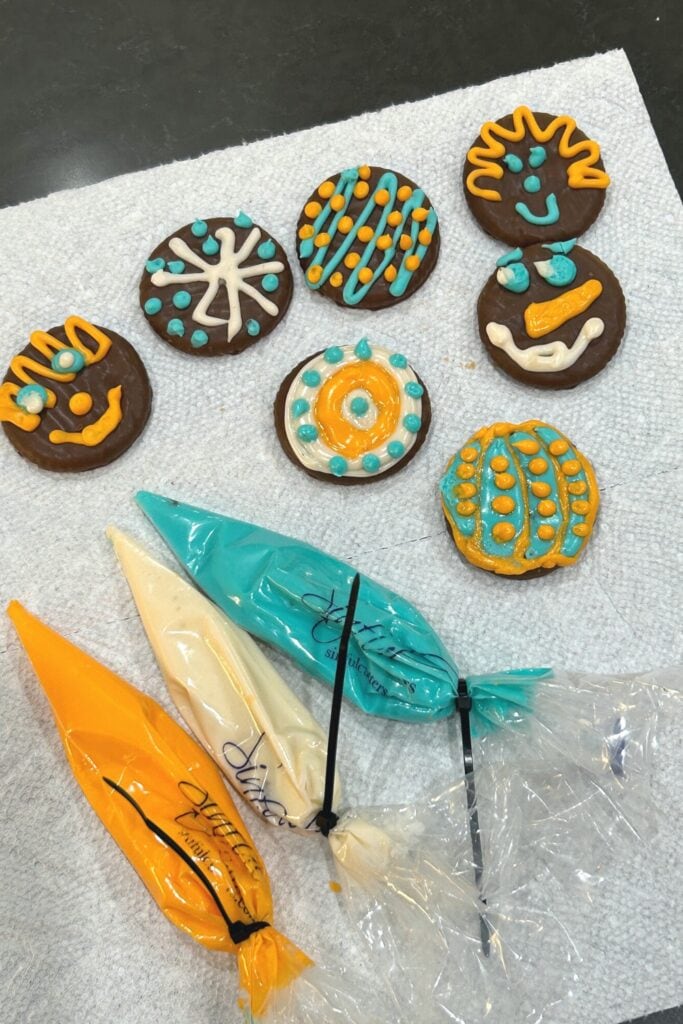
I’m telling you, dots and lines are not that easy to make))) But I will keep practicing. These store-bought snickerdoodle cookies worked okay too.
Final Tips
- Don’t give up.
- Master or at least become proficient to your satisfaction with one thing, like decorating, before moving on to baking the perfect cookie. There is nothing wrong with decorating store-bought cookies)))
- Watch videos.
- Follow blogs that feature cookie decorating.
- People that sell their cookies, probably have the best recipes))
- Have a plan before you start decorating, like a specific pattern. Otherwise, you’ll be like me on the Ritz crackers and just do this and that. Check out designs for round cookies. You’ll be amazed.
- Wait! Wait! Wait! Let the outline icing or sections dry. Like the painting by number kits. Work somewhere else on the cookie or better yet, work on another cookie.
- I did discover if you just dampen the tip of your finger you can smooth out little bumps.
- Have fun! After all, it is just a cookie)) Grandkids don’t care if the eyes don’t match or the squiggles are crooked as long as it’s sweet and tasty))
The Class
Our class was great. Cassie Angle did the teaching and the proceeds went to the building fund of our church. We had fun and fellowship with others, kids and adults. So if you get the opportunity to participate in something like this….go for it! You don’t have to have previous experience.
I’ve always wanted to take a cake decorating course too! And flower arranging. All those things that you never had time, or money, for during the younger years might be possible now.
Retirement is the time to enjoy learning new skills, even if we don’t plan to become experts at them. We can have fun trying!
More from My Blog
The form you have selected does not exist.