How to Take Product Images and Edit with Canva
This is a quick tutorial to show you how I take product images and edit them with Canva Pro. Most of the time, the products we sell on Trendy Tree have stock images that we use. But, sometimes not and we have to take our own.
If you are selling products on a website, you need to familiarize yourself with Google’s recommendations. These are summarized below, but you can read more here.
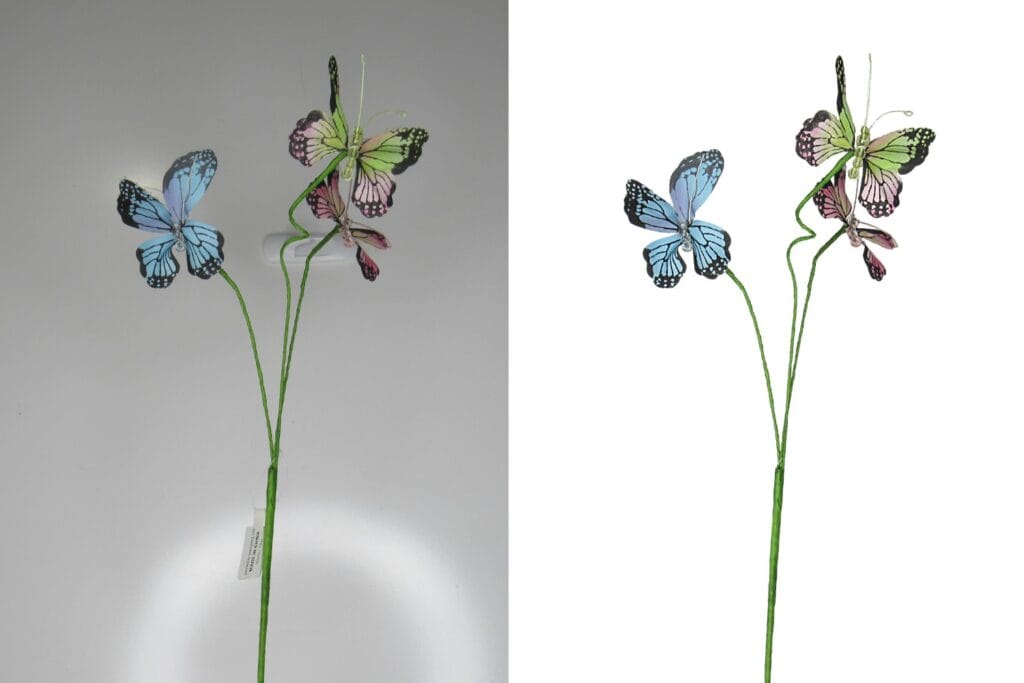
- Use a solid white or transparent background
- Frame your image where it takes up no less than 75% and no more than 90% of the full image
- Show one image of a variant (not multiple colors in one image) GUILTY!
- No borders
- No promotional elements (CTA, free shipping, price, watermarks, logos, barcode, etc)
- Recommended size at least 800 x 800 pixels up to 64 megapixels & 16MB file size.
These are not all the recommendations, but just the highlights. This post just speaks to photographing product images for e-commerce.
Images of creations such as wreaths, floral centerpieces, or bows would be a little different. It’s extremely helpful to show something like a wreath on a front door so that the customer can get a better idea of size, depth, and what the wreath would look like in real life. That’s a whole different ballgame)))
If you’re a crafter it’s really helpful to see how a specific product could be used in a project. So “extra” images for instance showing floral stems displayed in a vase or just laying on a table will help sell your product for sure.
Background
I use a precut piece of dry-erase board purchased from Lowe’s for my background. It has Command hooks on it because it is also the board I use for wreath-making. The size is 24″ x 36.” It normally sits on a floor easel for wreath-making and I move it to a small tabletop easel for product photography.
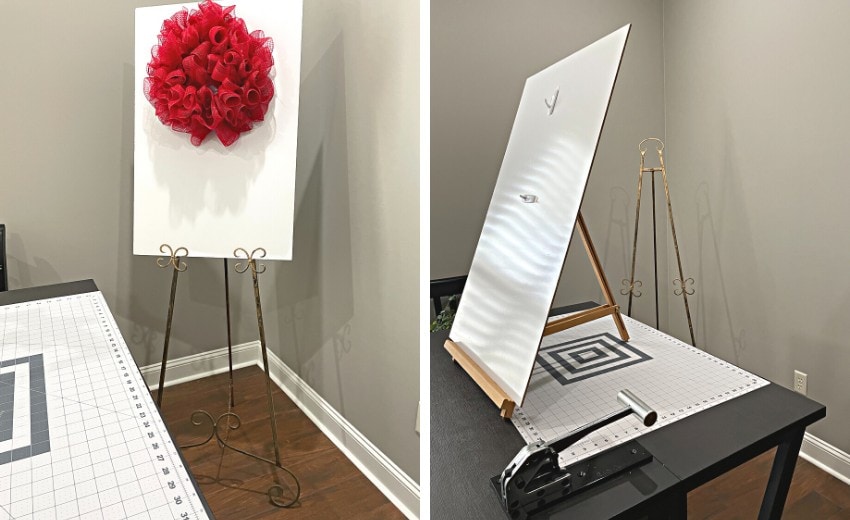
I place a smaller whiteboard in front of the dry-erase board to have a continuous white area. In the past, I have used items like a white poster board, a lightbox for small items, and even white printer paper when I needed to cover up a gap somewhere.
As I say, I’m no professional photographer, I’m just sharing some of the things that have worked for me through the years.
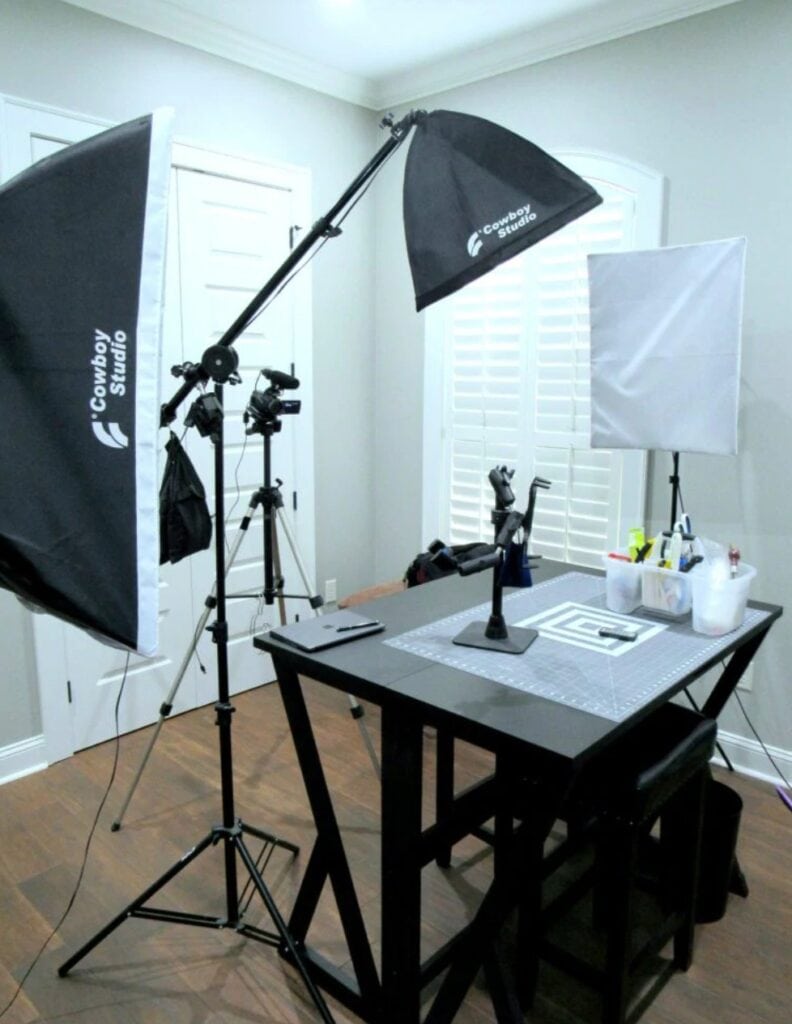
Lighting
My lighting setup has gotten simpler! In the past, I’ve used two box lights and a boom light. The older I get, the simpler I make things! Now I only use the one ring light. I don’t know how those lights survived through the years! They are so easy to trip over!
Matt took my box lights and boom light to his house. He’s interested in cinematography and it got them out of my way! Not sure what Carrie thought about that….but when your grandchildren ask for something, you help them out.
You know we’re not talking about product photography in an ideal business setting….we’re talking about how to get by the best you can)))
Camera
Use a tripod with your camera. Now you can get great shots with your smartphone too and I do it all the time! But if I have a lot of product images to take, I’ll set up a still camera on a tripod.
Use the macro setting and take large images (pixels). The more pixels you have in your image, the more editing you can do without losing sharpness.
My camera is a Canon SX530 HS and only 16 megapixels and I’ve had it for a while now. But it still serves my purpose well. The still camera I had before this was a Sony and was my favorite, but memory sticks were falling by the wayside. How can we ever keep up with digital technology! I try to store most everything now “in the cloud” as they say. But what happens if something happens to me and no one continues my subscription? Well, I guess no one but me would miss my stuff anyway, so I guess it’s not a problem lol.
Editing Software
I edit with Canva Pro 99% of the time. Photoshop also comes in handy, but I really find that Canva is simpler and you can do so many things with it. I’ve been thinking about doing some basic Canva tutorials. Would you be interested in that?
There are all sorts of image editing apps you can get for your smartphone and Canva has that too. There is a free version and a Pro version.
Call it old school I guess, but for blogging and product images, I find it’s easier to edit with Canva on a desktop with a keyboard and mouse.
Canva has a free subscription that is pretty awesome, but once you learn the ropes you’ll probably want to go on and get the Pro subscription because it offers so much more in the way of graphics, photos, templates, and more.
I would recommend experimenting with the free subscription first, just be aware that if you download something from the Pro selections, you will be charged. I learned this the hard way. In their defense, it was telling me I was going to be charged, but I was zipping through things and didn’t notice the charge until I had hit download. So just watch that)))
Canva Pro is a subscription service and not downloadable software. That means you have to be online to use it. You can use the free app on your phone, and any work that you do from that device would sync back to your Canva account.
Wrap Up!
I hope you gained some useful information from this post on taking and editing images with Canva. My Canva affiliate link is included throughout the post Again, you won’t see me promoting things that I haven’t had first-hand knowledge of and that I like)))
More from My Blog
How to Make a Bow with 3 Yards of Ribbon
Thinking of Making the Change from PC to Apple? Do It!