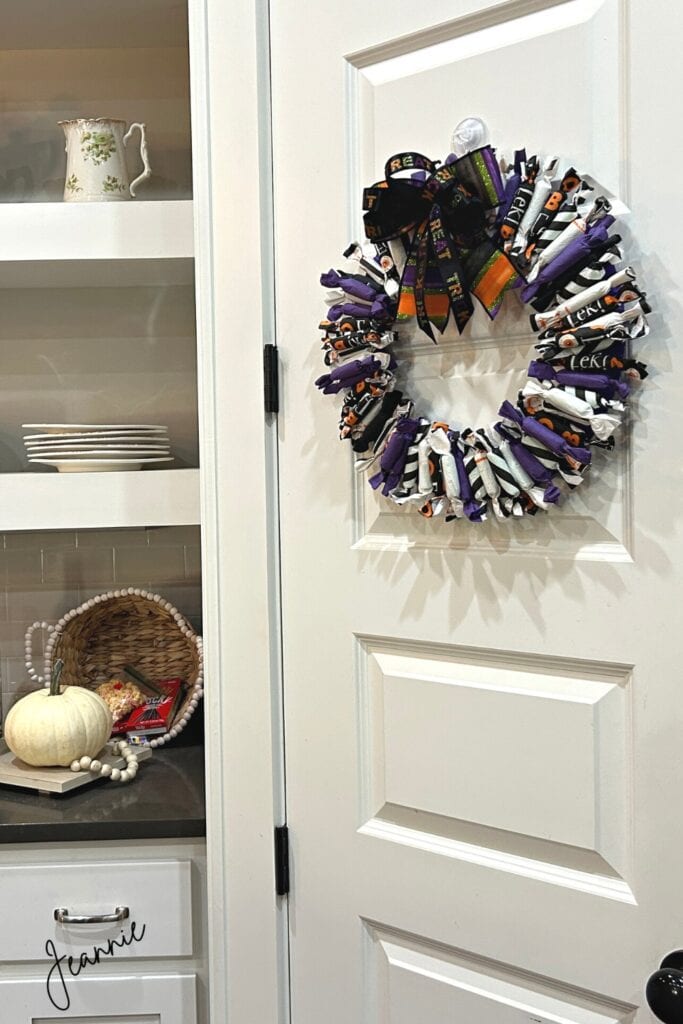
Halloween Candy Wreath
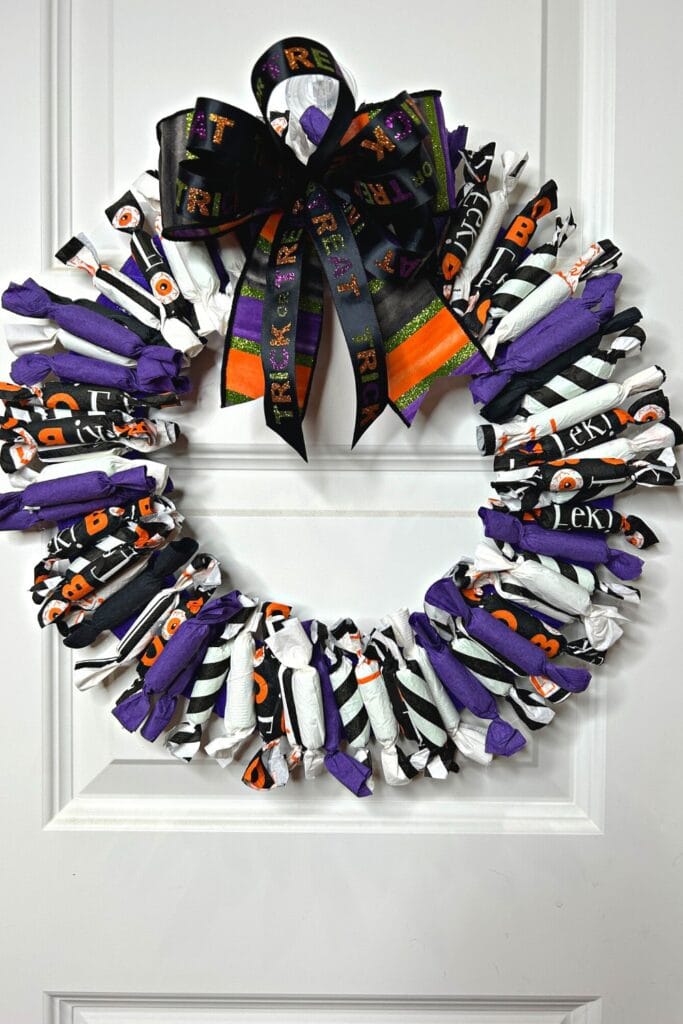
This is a simple Halloween Candy Wreath that is perfect for indoor use. This is a tutorial I did a while back. I hung mine on my kitchen pantry door. It was very lightweight and made from paper napkins, so it wasn’t suitable for outdoor hanging. I also used some supplies from Dollar Tree, which has great Halloween items!
Supplies
14″ Wreath Form (Dollar Tree)
Cocktail Napkins (Dollar Tree & Dollar General)
6″ Sponge Hair Rollers (Dollar Tree) – 4 pkg
Hot Glue
Halloween Ribbon (Trendy Tree)
Halloween Candy Wreath
The first step was to wrap the 14″ wreath form with ribbon. Initially I had tried to hot glue the “candies” to the wreath form without ribbon, but it’s much easier to cover the wreath form first. You could use any sort of ribbon that matches your other elements.
Make the Candies
The sponge hair rollers came from Dollar Tree and I used four packages. I wasn’t sure how many it would take to make a Halloween Candy Wreath. This was the first time I had tried one. My inspiration came from a wreath I saw in a showroom at market months ago.
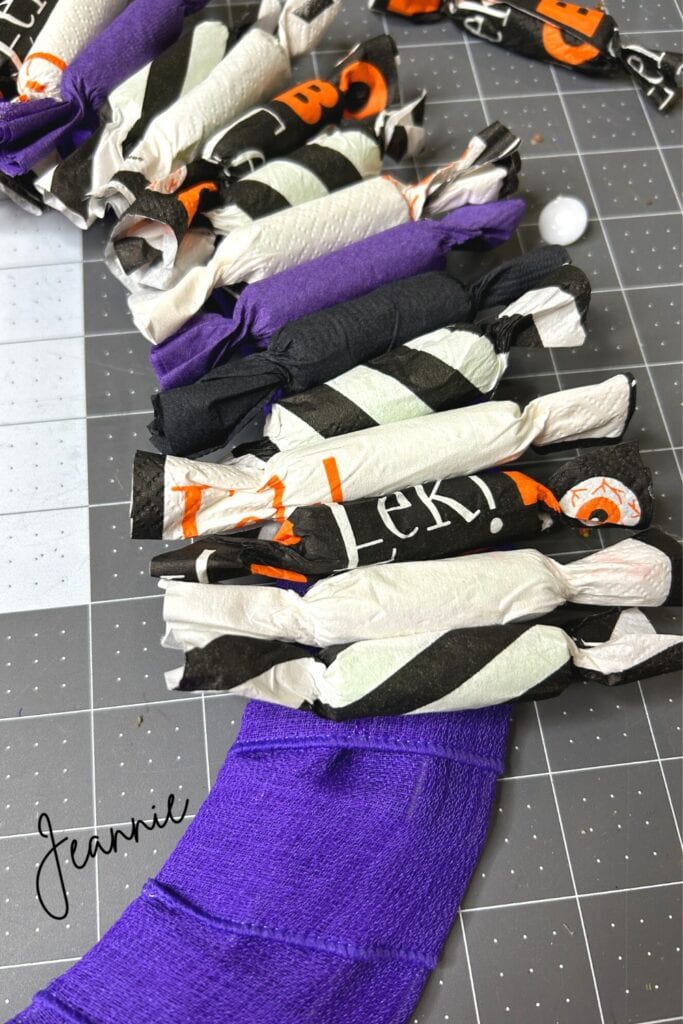
The cocktail napkins came from Dollar Tree and Dollar General. I looked for something cellophane but opted for paper napkins. The first day I shopped I had luncheon-size napkins in assorted colors but decided cocktail size might be better.
Wouldn’t you know it….no orange cocktail napkins were left in town…anywhere! So my wreath doesn’t have as much orange as I would have liked, but I still am pleased with the way it turned out.
Also, I found that the pretty printed part of a cocktail napkin (on the ones I bought anyway) was just on the top side. Once you unfold the napkin, the rest was plain or only had a border. I made this work anyway though.
Trim off the folded edge of the napkins. I used a rotary cutter from my wreath-making tools to speed the job up a bit. And by the way, I had way too many napkins….so that’s why I didn’t list how many packages to use in the supplies. It all depends on how many different patterns or colors you want to use. You can wrap four candies from one napkin.
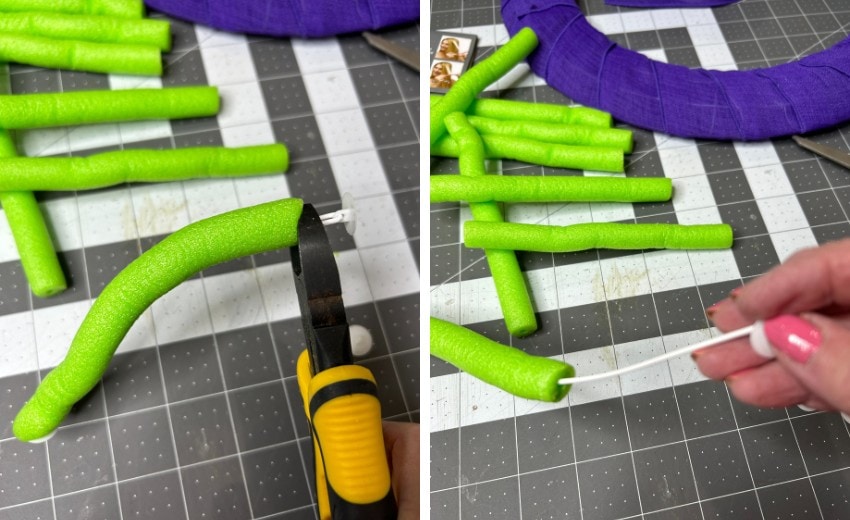
Sponge Hair Rollers
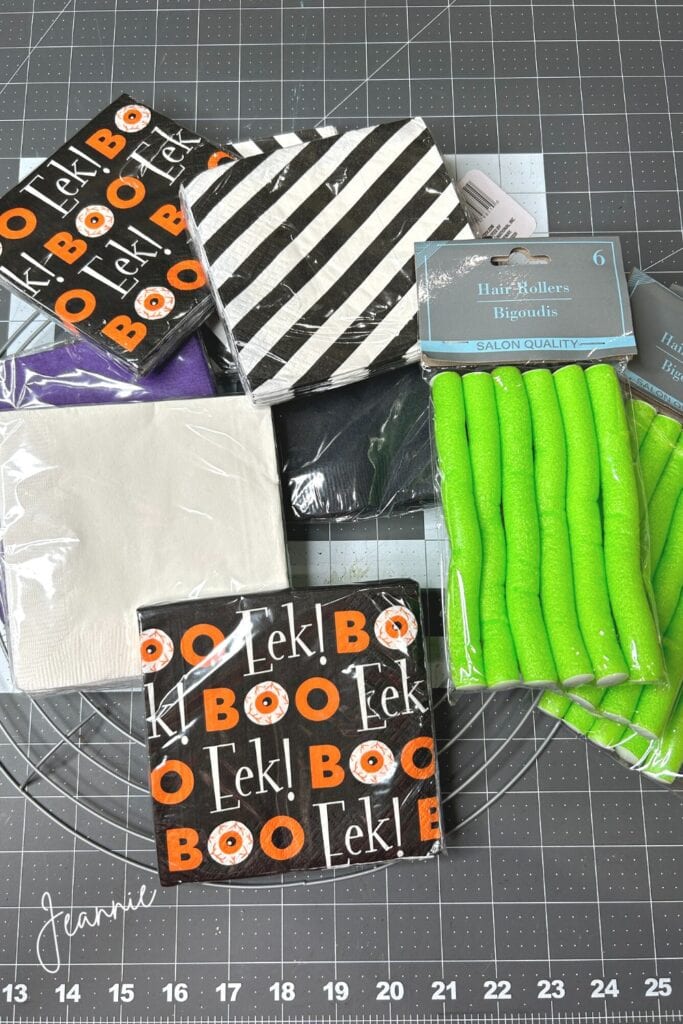
The sponge rollers were about 6″ in length and came in a package of six. I cut each one into three pieces. One package yielded 18 candies. Four packages = 72 pieces. I was able to go around the 14″ wreath form with one layer of candies and the extras were added as a second layer evenly spaced around the wreath.
You could always add more if you like. The rollers had a wire inside so I cut the end off and removed them.
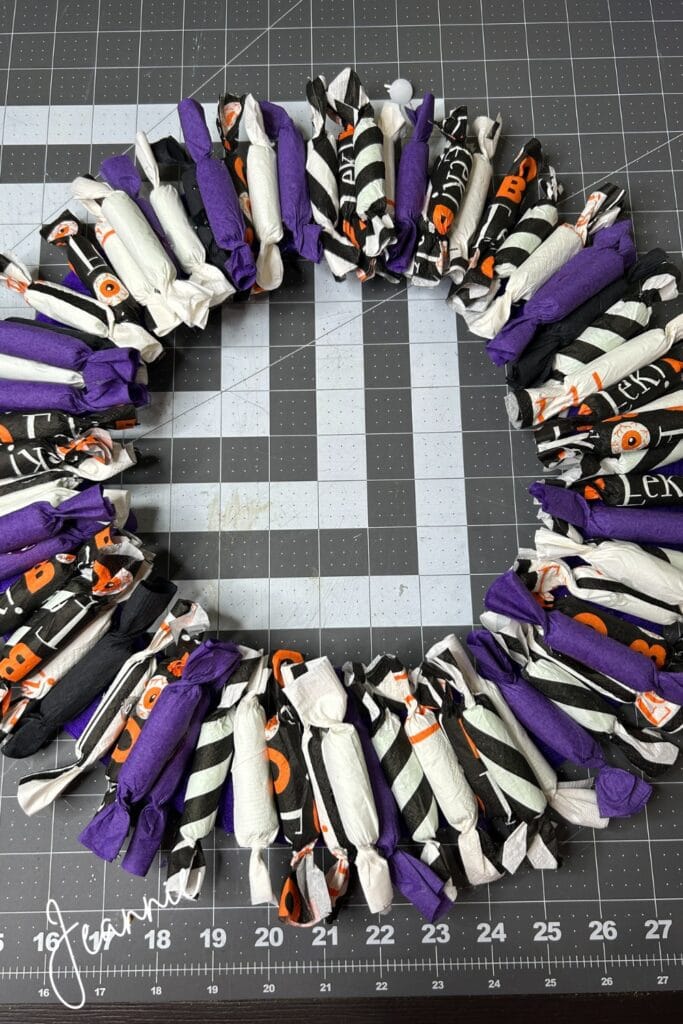
Hot glue the candies to the ribbon-wrapped wreath form. Be careful! My hot glue gun doesn’t have a high or low setting and I came away with a blister this time.
Place the candies randomly around the wreath form in no particular pattern. Now, if Carrie had been here…..we would have had a pattern…lol
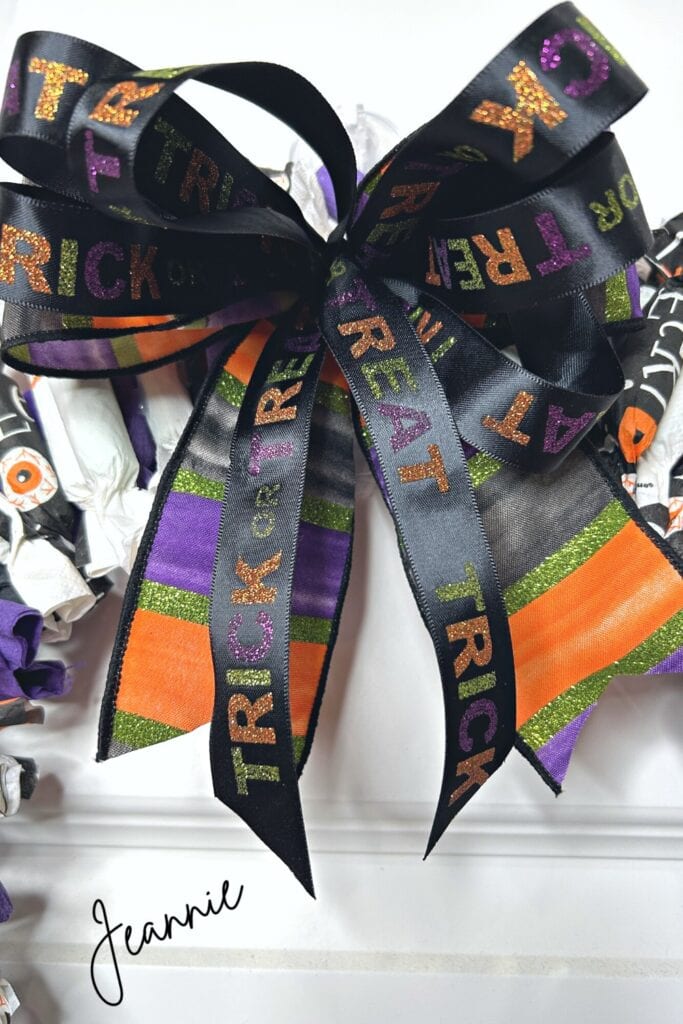
Make a Bow
I made a bow out of some leftover Halloween ribbon. The 2.5″ piece of ribbon that I used was just enough for a simple bow. The trick-or-treat ribbon came from Trendy Tree. It was narrow 7/8″ wide and had no wire.
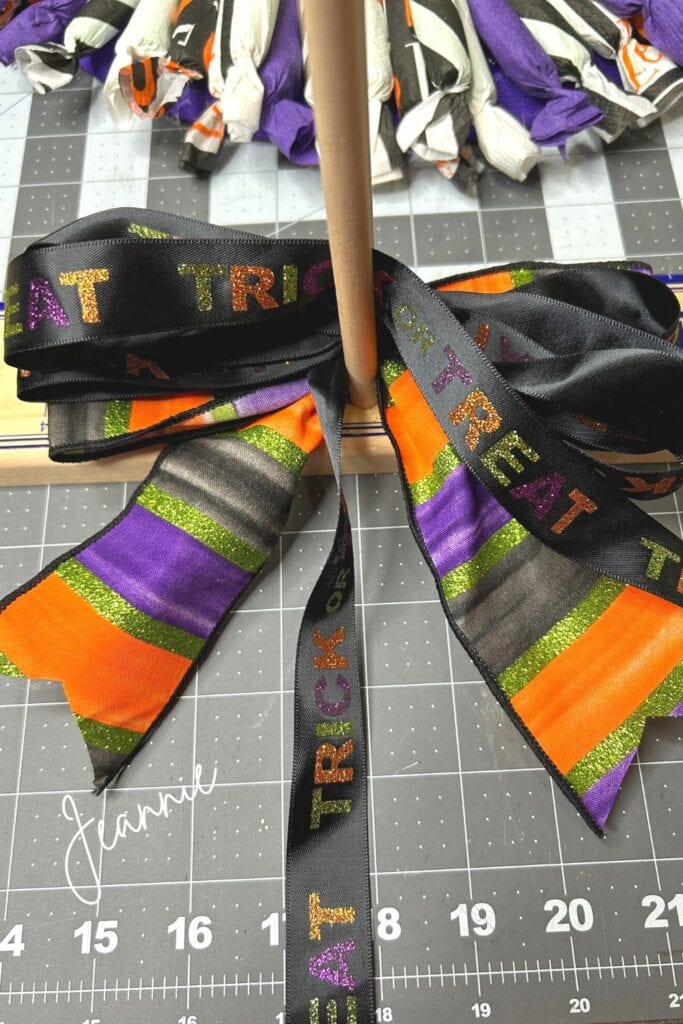
Sorry, but I wasn’t able to video the bow this time. It was just a 3″ loop on each side with the striped ribbon and three loops on each side with the trick-or-treat ribbon. I fluffed the bow on my homemade fluff box. Do you have one of these? It’s easy to make! Here’s a link:
Just add the bow to the top, side, or bottom of the wreath. And you’re done!
Hang the wreath inside of course because of the paper. It was very lightweight and came out to about 17″ – 18″ in width. I put mine on the kitchen pantry door for a little spookiness in my kitchen)))
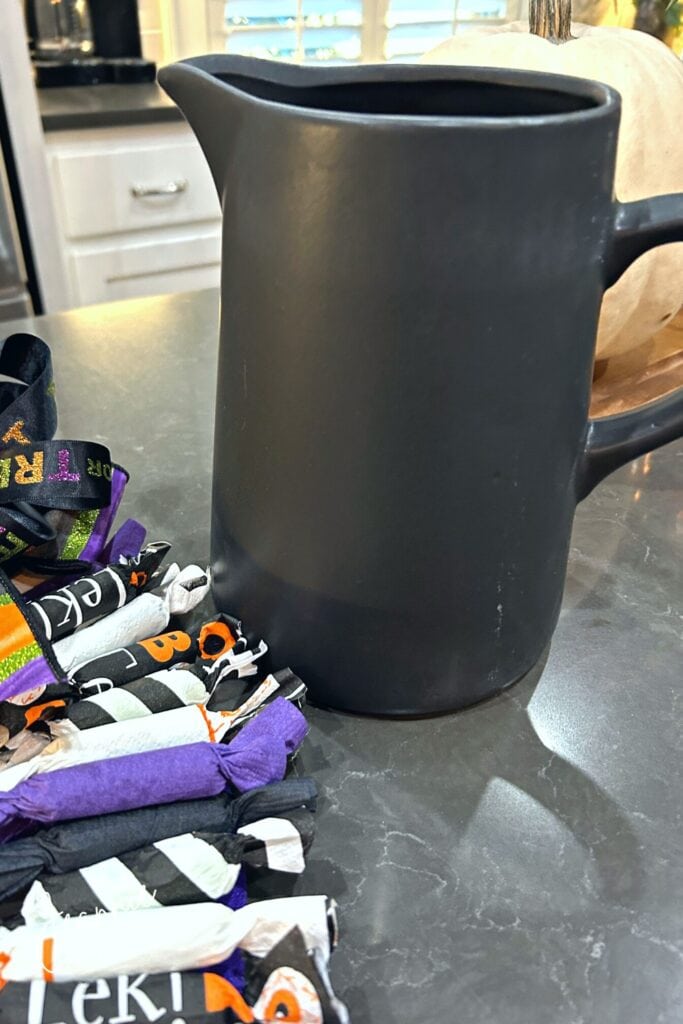
Oh by the way! I found this great black ceramic pitcher while shopping at Dollar General for cocktail napkins. It will be great to hold some dried hydrangeas painted orange or something like that. I need to get busy and get that done. Halloween is almost here!
Imaging Tip
Some of you may be crafters who sell your projects. Or even if you just post them on social media you might use this tip. I wanted to show you the difference in the images I made of my wreath in the kitchen. The lighting seemed good, but my cabinets are off-white color. The under-the-cabinets lights have a yellow cast.
After I made the first images, I realized I should have brought my ring light to the kitchen first. I just wanted to share the images with you to show the difference when you have more light.
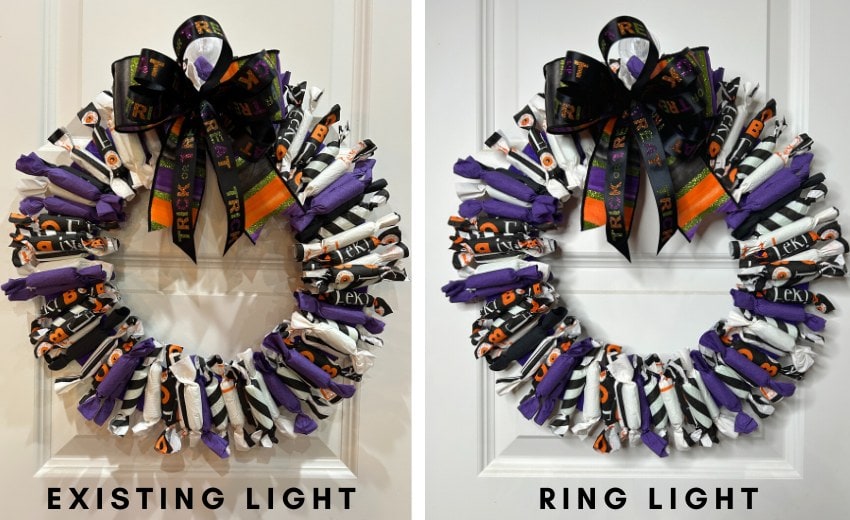
There are still some shadows, but the colors are brighter and the door shows up truer in color. Put a ring light on your Christmas list!
Carrie gave me this ring light for Christmas and I use it over my craft table for my project videos. I was able to do away with my big bulky box lights. The ring light is on a stand and will hold your phone if needed. Here’s a link: Inkeltech 18″ Ring Light
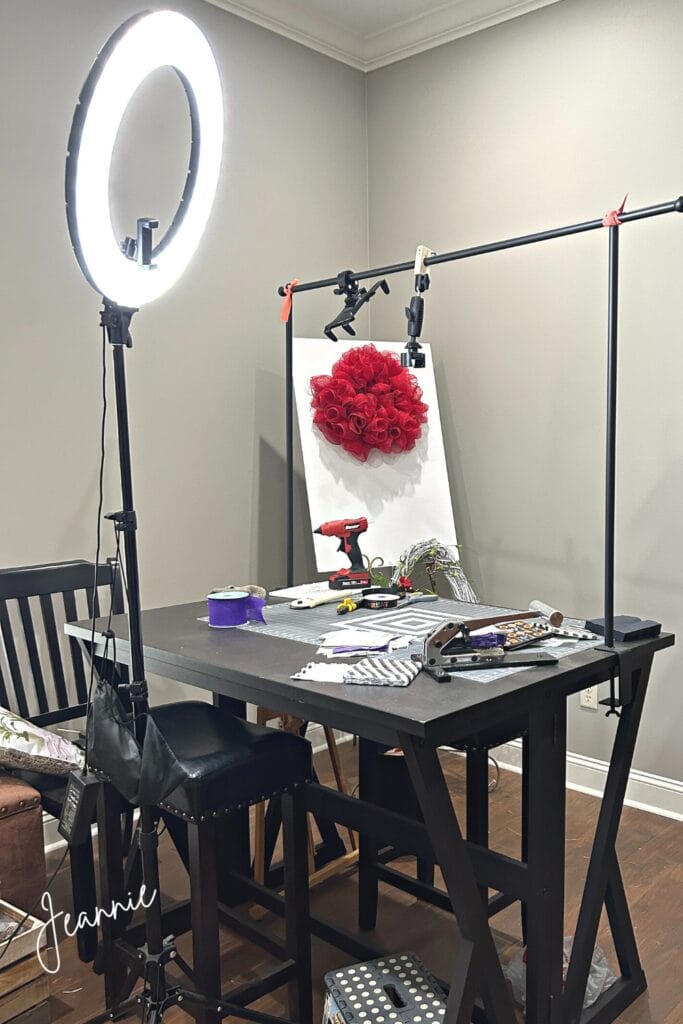
Just wanted to share this tip))) Pay no attention to my craft room. I usually clean up after each craft. Obviously, I didn’t this time, but I wanted to show you what a ring light looks like))